Learning Java: Step by Step Make a Rest API
In this day and age, we cannot be separated from the use of mobile applications ranging from WhatsApp, BukaLapak, GoJek, Detik.com and so forth. If we try to dig up what we see on every page of the application it can be divided into 2 layers.
- Presentation Layer, which is static, such as layout and style for images, titles, content, etc.
- Dynamic Layer, is the dynamic data layer obtained from data communication to the server.
Data communication to the server usually uses the HTTP protocol and to reduce the size of the data transfer using the JSON format schema information. In short, mobile communication applications to the server in general use the HTTP protocol and JSON format and this is commonly known as the JSON-Rest API communication.
Here the author tries to share how to create a JSON-Rest API especially using java and the framework http://sparkjava.com . This article might be suitable for the following readers:
- Feeling fun learning java coding,
- Want to make a prototyping API
- Want to build a backend mobile application
- Build middleware * suitable for typical microservices
Preparation
- Download and Install Java JDK at http://www.oracle.com/technetwork/java/javase/downloads/index.html
- Download and install Eclipse at https://www.eclipse.org/
Project Setup
- Creating a New Project
Open Eclipse and create a project type Maven File> New Projet> Maven project


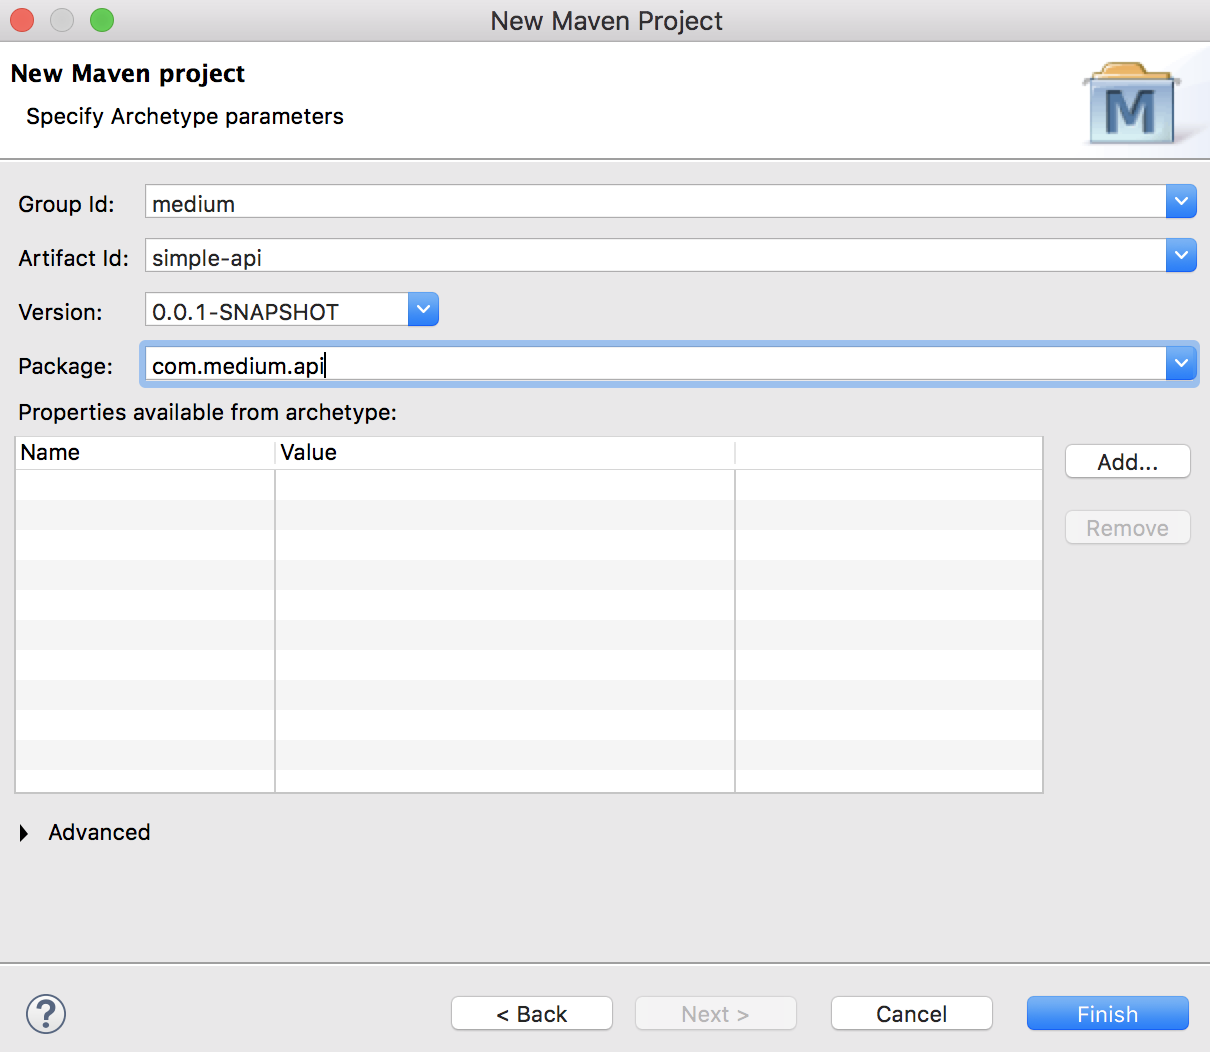
Continue step by step default until finally entering the project name and package name as below


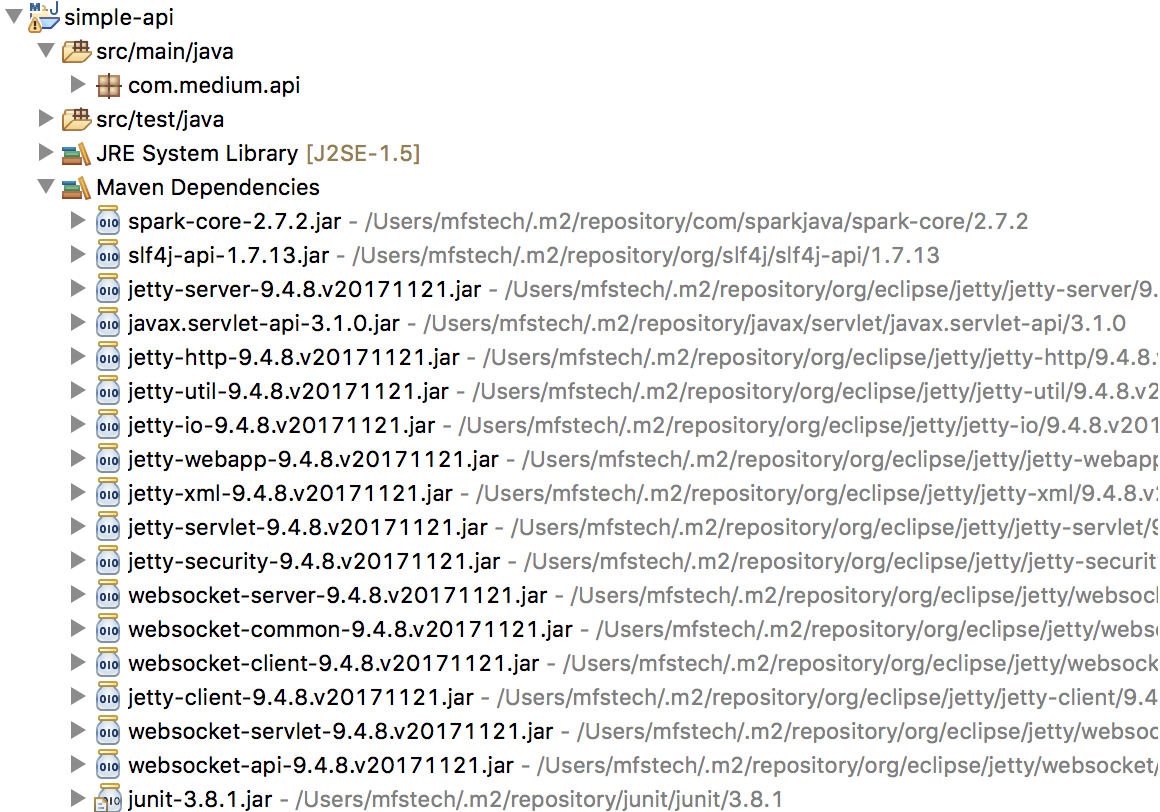
2. Enter the library to create a Rest Server with Maven
- The project is ready, we will use the framework library http://sparkjava.com
- Open the pom.xml file, and enter the config maven repository
<dependency>
    <groupId> com.sparkjava </groupId>
    <artifactId> spark-core </artifactId>
    <version> 2.7.2 </version>
</dependency>


Save (Ctrl + s) and wait for maven to download the required library so that it appears in the "Maven Dependencies" library

Start Coding
- Open the App.java file and create it as below, or you can later copy it from github. In each block we can read the function description for anything.
2. Create File Server.java to listen to the server and handle the response request
3. Create a config file under the project folder, for example conf / server.prop
We have finished creating the following 3 files, App.java Server.java and server.prop (in the conf folder)


Start Running Server
- Right-click on the App.java file and select Run As> Configuration


2. Double click App


3. Then select the Arguments tab, and enter the server.prop config path


Then click Run


Alhamdulillah :), to this end the reader can create and run the rest-API, then the important thing is to wrap the response in JSON format again.
Add Response JSON
Deployment on the Server
After it can run via Eclipse, then we can deploy or run standalone. Both in Windows and Linux, running Java can be done simply by using a runnable jar.
- Right-click project> export> Java> Runnable Jar


- Start running the jar file, open a command prompt and type java -jar restapi-01.jar or use a script both in windows or linux with the same format {path-java} -jar {java option} {file-jar}
#! / bin / bash
java -jar restapi-0.1.jar


Alhamdulillah, congratulations, readers can make a simple JSON format rest-API with java !!!
Explore more SparkJava
readers can explore more at http://sparkjava.com/documentation


What readers have learned:
- Setup Eclipse with Maven (Libray Repository)
- Server setup and API rest handler, using the library http://sparkjava.com/
- Explore sparkjava (port, thread, timeout settings)
- Make a handler with JSON response
- Running standalone application
What's next is good to learn:
- Database Integration
- Integration with Log4j2 Log files
- Integration of monitoring with ELK (ElasticSearch, Logstash, Kibana)
Source code can be seen at https://github.com/qomarullah/RestAPISample
Thank you :) good luck !!!
Belum ada Komentar untuk "Learning Java: Step by Step Make a Rest API"
Posting Komentar